Raspberry PI webcam

Raspberry PI webcam
The goal is to setup an USB webcam on a Raspberry and to take picture on a cyclic way.
The solution is able to transfer the picture to a remote directory (on a web server for example).
Il faut
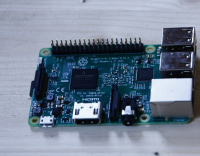
- Raspberry 2
- cheap USB webcam
Setting the raspberry
First of all, you need to grab and install NOOB. There are so many tutorial on that point that I don't want to describe how to do it. Please refer to the source page of the project on raspberrypi.org
Set time
Set the time with a cron job :
sudo crontab -e
and add the line :
# Mise a jour de l'horloge
0 */1 * * * ntpdate pool.ntp.org
Install fswebcam
sudo apt-get fswebcam
Make a script to take pictures cyclically and send this picture to a remote machine, create a file /home/pi/.fswebcam.conf with :
|
resolution 800x600 |
Note that this script will execute the file command.sh in the directory /home/pi/Pictures |
Transfer picture to an other server
SCP can copy a file over secure access. We will implement a solution using ssh keys just because the batch file is not enabled to enter a password :-)
Install ssh in the remote (and local machine) :
sudo apt-get install ssh
Generate keys with the command (public and private key will be stored in the .ssh directory) :
ssh-keygen -t dsa -b 1024 -f ~/.ssh/YourRemoteServerName
Transfer the public key to the remote server :
ssh-copy-id -i ~/.ssh/YourRemoteServerName YourRemoteUser@YourRemoteServerName
Create the command.sh script that will use our key and transfer the picture to the remote server :
scp -i /home/pi/.ssh/YourRemoteServerName /home/pi/Pictures/viewcam.jpg YourRemoteUser@YourRemoteServerName:/var/www/html/webcam/pictures
Make the script executable :
sudo chmod 755 command.sh
Now you have a standalone raspberry who can take pictures and send them to another machine. Let's make a webserver's page to display this picture on internet.
To execute our script, in a terminal just enter the command line (Ctrl-C to stop it) :
fswebcam -c /home/pi/.fswebcam.conf
If you are looking for a solution that works on bootup to the console, take a look at this link. Basic rundown:
- Create a file for your startup script and write your script in the file. As the script is in the init.d directory, it have to have a specific header to respond with the runtime dependencies :
sudo cp /etc/init.d/skeleton /etc/init.d/autostart.sh
sudo vi /etc/init.d/autostart.sh
... and paste the above command line at the end :
# Execute the script fswebcam as "pi" user
su - pi -c "fswebcam -c /home/pi/.fswebcam.conf"
- Make the script executable:
sudo chmod 755 /etc/init.d/autostart.sh
- Register script to be run at startup:
sudo update-rc.d autostart.sh defaults
Configuring a page to display picture
As we have seen before (see "command.sh"), the picture is transfered in a directory name /var/www/html/webcam/pictures, so the PHP script will display this picture and reload it every minute (60 seconds).
Here is the index.html :
<html lang="en">
<head>
<title>My beautiful webcam</title>
<META HTTP-EQUIV="Refresh" CONTENT="60; URL=index.html">
</head>
<body>
<div data-src="pictures/viewcam.jpg"></div>
</body>
</html>
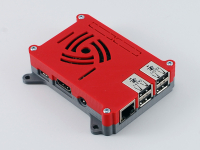
Making a box for your Raspberry Pi 3
You can grab the box I used for this raspberry here : http://www.thingiverse.com/thing:922740

Configuring Raspberry WIFI network
Il faut
- Raspberry with raspbian
Of course, you can setup your WIFI with the GUI in your Rapberry by following the Foundation Guidelines https://www.raspberrypi.org/documentation/configuration/wireless/README.md but, this is the way to setup manualy your WIFI network.
To scan for WIFI network, enter the command :
sudo iwlist wlan0 scan
The name of the WIFI (the SSID) is a line starting with ESSID:"YourWIFINetwork"
Edit the network configuration etc/wpa_supplicant/wpa_supplicant.conf :
WIFI interface is eth0 (wlan0 is for your wired network), so locate the line iface eth0 inet dhcp and change it as root to :
network={
ssid="YourWIFINetwork"
psk="Your_wifi_password"
}
Restart the network :
sudo /etc/init.d/networking restart
Define your Rapberry hostname :
sudo raspi-config
Go in Advanced option > Hostname and enter what you want
Done
You can see if your setting have been update with the command (it will display the @IP you enter before in the wlan0 part):
ifconfig wlan0

